Showing posts with label Thing One. Show all posts

Wednesday, October 14, 2015

Thing One's Apache Update and Transition

If I didn't mention it before, and I'm sure I did I will say it again, this kit is terrible. The part numbers are all over the place on the sprues. Instead of going in numerical order they go 20, 73 and 36 maybe right next to each other, so finding the part is especially difficult.

Since I've been woefully behind on creating posts, we've got a lot going on this time but at least we will finish up the construction phase. Let's get to it.


Terrible
The underside coming along.

Terrible
Why would a manufacturer put their name on the outside area of a part? Yet another irritation from this horrendous, garbage kit. Thanks Revell.

20150317_213416


As I mentioned in the title, this post is about transition. Just as I had, Thing One lost interest. After the runaway success of the P-51 Mustang, Thing Two wanted a challenge. He took up the mantle of this ridiculously junky kit. Brace yourself for a lot of pictures.


Thing Two takes over
Okay, I actually did the masking here. It took all of about 10 minutes. I wanted to see how fast I could do it throwing quality to the wind. It was mostly straight edges, easy peasy.

Thing Two takes over
Snipping parts.

Thing Two takes over
Glued and clamped the back wheel together.

Thing Two takes over
Snipping.

Thing Two takes over
Gluing.

Thing Two takes over
Attaching the missiles and rocket pod. Thing One did the opposite side.

Thing Two takes over

Thing Two takes over

Thing Two takes over
Gluing some random part.

Thing Two takes over
Gluing the rear elevator together. This was a mistake, as I will point out later.

Thing Two takes over
Get all that glue in there boy!

Thing Two takes over
More gluing.

Thing Two takes over
Thing Two used Micro Kristal Klear to attach the clear parts. Here he is using a moistened cotton bud to clean off the ooziness. Saliva on the cotton bud does wonders. I also didn't feel like getting water. I was conserving energy!

Thing Two takes over

Thing Two takes over
Tada! Thing Two did a pretty good job, especially during the dry fit. Things didn't exactly line up, but show me something on this kit that does.

Thing Two takes over

Thing Two takes over
The rear wheel, what an exciting picture.

Thing Two takes over
I taught Thing Two that little parts disappear when they are snipped without being held. I showed him how to hold the part with tweezers and cut with the knife. Not bad for a 6 year old!

Thing Two takes over
All the tiny hand holds and foot holds are what drove Thing One from this model. Thing Two took it on without complaint.

Thing Two takes over

Thing Two takes over
Gluing more foot holds.

Thing Two takes over
See that horizontal bar at the top? The two elevator halves should have been glued with that sandwiched in between. Modifications had to be made. Just for the record, I wasn't really paying that close attention to the directions either.

Thing Two takes over
Construction completed!


We gave up on some of the foot and hand holds because of the poor fit and some appeared to be missing. I said the heck with them and Thing Two agreed. Now that the assemblage has completage, the model is ready for priming and painting. We will be going for a non-traditional paint scheme for this model. The U.S. Army Helo Drab just seemed too pedestrian.

Thanks for checking in!

Friday, June 26, 2015

Thing One's Spitfire Cockpit Painting and Weathering

As promised, here is the more substantive post. We will continue with the painting and weathering of the cockpit for Thing One's Mk.I Spitfire.


Thing One cockpit painting
Maybe it was crazy, but I let him use the Infinity. "Just don't drop it" was the only cautionary advice I could think of.

Thing One cockpit painting
The parts were painted with Model Master Acryl RAF Interior Green and the seat was done with the Tamiya's Hull Red rattle can I had from the last time.

Thing One cockpit painting
Time to hand paint some details.

Thing One cockpit painting
Hand painting takes a bit of practice, but he didn't do too bad.

Thing One cockpit painting
Getting paint on that instrument panel.

Thing One cockpit painting
Picking out some details on the office walls.

Thing One cockpit painting
We dry brushed a little white to highlight the black details. I've got some ideas now for my next Spitfire. I'll be dry brushing the ribs with a lightened interior green as well as a little chipping.

Thing One cockpit painting
Dry brushed the white on the instrument panel. After this was all cured, I hit it with some Alclad Aqua Gloss from the trusty Badger Anthem 155.

Cockpit Finishing
Now the fun part, slopping the wash on to dirty it up.

Cockpit Finishing

Cockpit Finishing
Thing One was trying to paint it a little too much, I had to keep reminding him to just be sloppy with it.

Cockpit Finishing
Tada! Now we let it sit for 20 minutes or so.

Cockpit Finishing
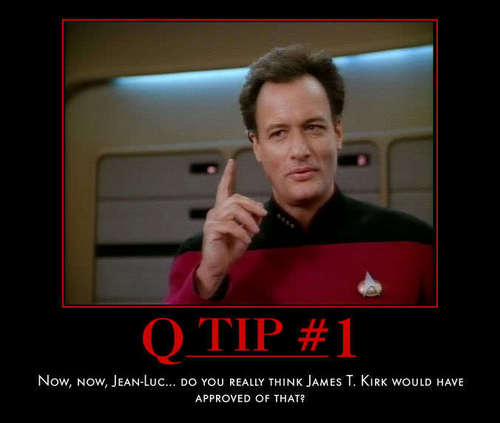
Clean-up with the tips of Q.

Not that kind of "Q Tip"!

Cockpit Finishing
Enough of that. I've never been one for such non-sense!

Cockpit Finishing
Washed cockpit parts awaiting cleanup.

Cockpit Finishing

Cockpit Finishing
She looks well worn Captain!

Cockpit Finishing
Office completed and assembled.

Cockpit Finishing


The next steps will be assembling the fuselage halves and gluing the cockpit in place. Maybe you'll see it in a couple of weeks? You don't have to wait around, I'll send you an email when it's ready...just subscribe! (What a shameless plug.) Thing One says: "It's difficult putting small parts into their places. Thanks for reading."

Thursday, June 18, 2015

Thing One's Spitfire - Cockpit Assembly and Primed for Painting

I was going through my blog post drafts and realized I haven't started a new build for the Tamiya Mk.I Spitfire that Thing One received for his birthday. It is the same Spitfire kit that I completed last year, so I know its build quality and ease of assembly. Perfect for a first...or second model kit.


Cockpit and prime
Snipping the parts off the sprue.

Cockpit and prime
That's right, more snipping.

Cockpit and prime
The cockpit semi-assembled. It will stay in this state until after painting to facilitate that process.

Cockpit and prime
Assembled interior and ready for priming.

Cockpit and prime
Primed with AK Interactive's Gray Primer.


"What? That's it???? NOOO!!!!!!!"

I promise the next post will be a bit more substantive. This was something to whet your appetite.